
![]()
After making music for over 15 years, my studio has gone through tons of changes. I’ve gone from software, to hardware, and back to software again. I’ve gotten lost in gear lust and eventually pulled back to a more minimal setup. The technology is always changing, but what remains constant is a good workflow. Creativity needs an organized workplace in order to thrive. So here are my tips to declutter your workspace and allow those creative ideas to blossom:
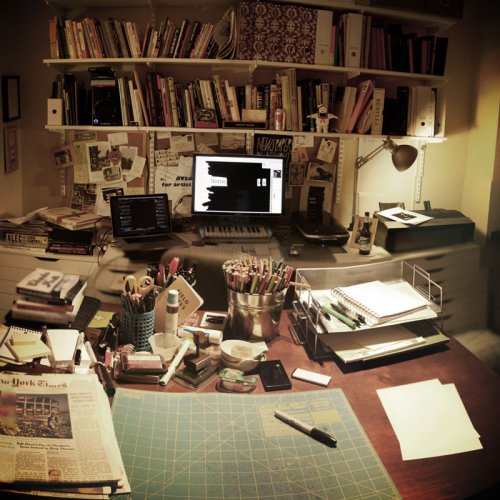
- Remove Any Non-Essentials From Sight:Out of sight, out of mind. Move unused synths, trash outdated post-it notes, and organize any files piling up on your computer’s desktop. Make use of shortcuts and aliases to keep common tasks within reach on your computer (sample libraries, plugin directories). Set aside time for regular maintenance: clean up your files, remove unused apps and plugins, and schedule and refine backup automation. I use Carbon Copy Cloner for my backups. I currently do not recommend any computer cleaning software as most create more problems than they solve.
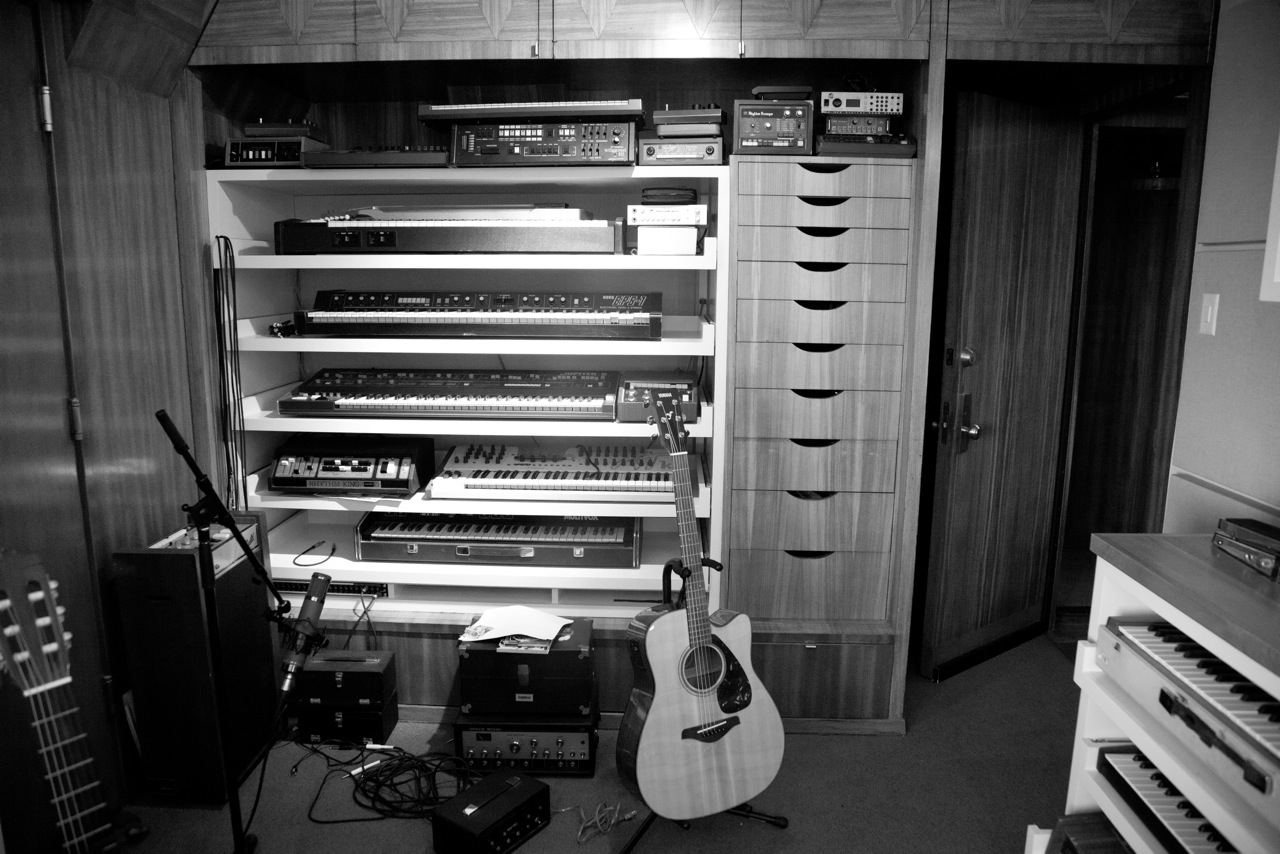
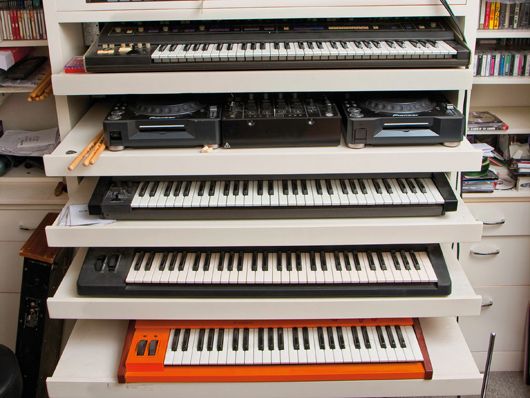
- Store it, Sell it, or Goodwill it.Take an honest look at your gear, especially if it’s within an arm’s reach. Do you have some rare synths you’ll use only occasionally? Use “active storage” and store them completely wired and ready for use – power, data, and audio cables.
Moby uses an innovative shelving storage solution instead of stands to keep his synths, drum machines, and pedals ready for use. Running around to find 9V batteries and patching the audio inputs will disrupt your creative flow. Take care of this ahead of time so you don’t break the flow. If you never use a piece of gear, just remove it and store it for later use
.


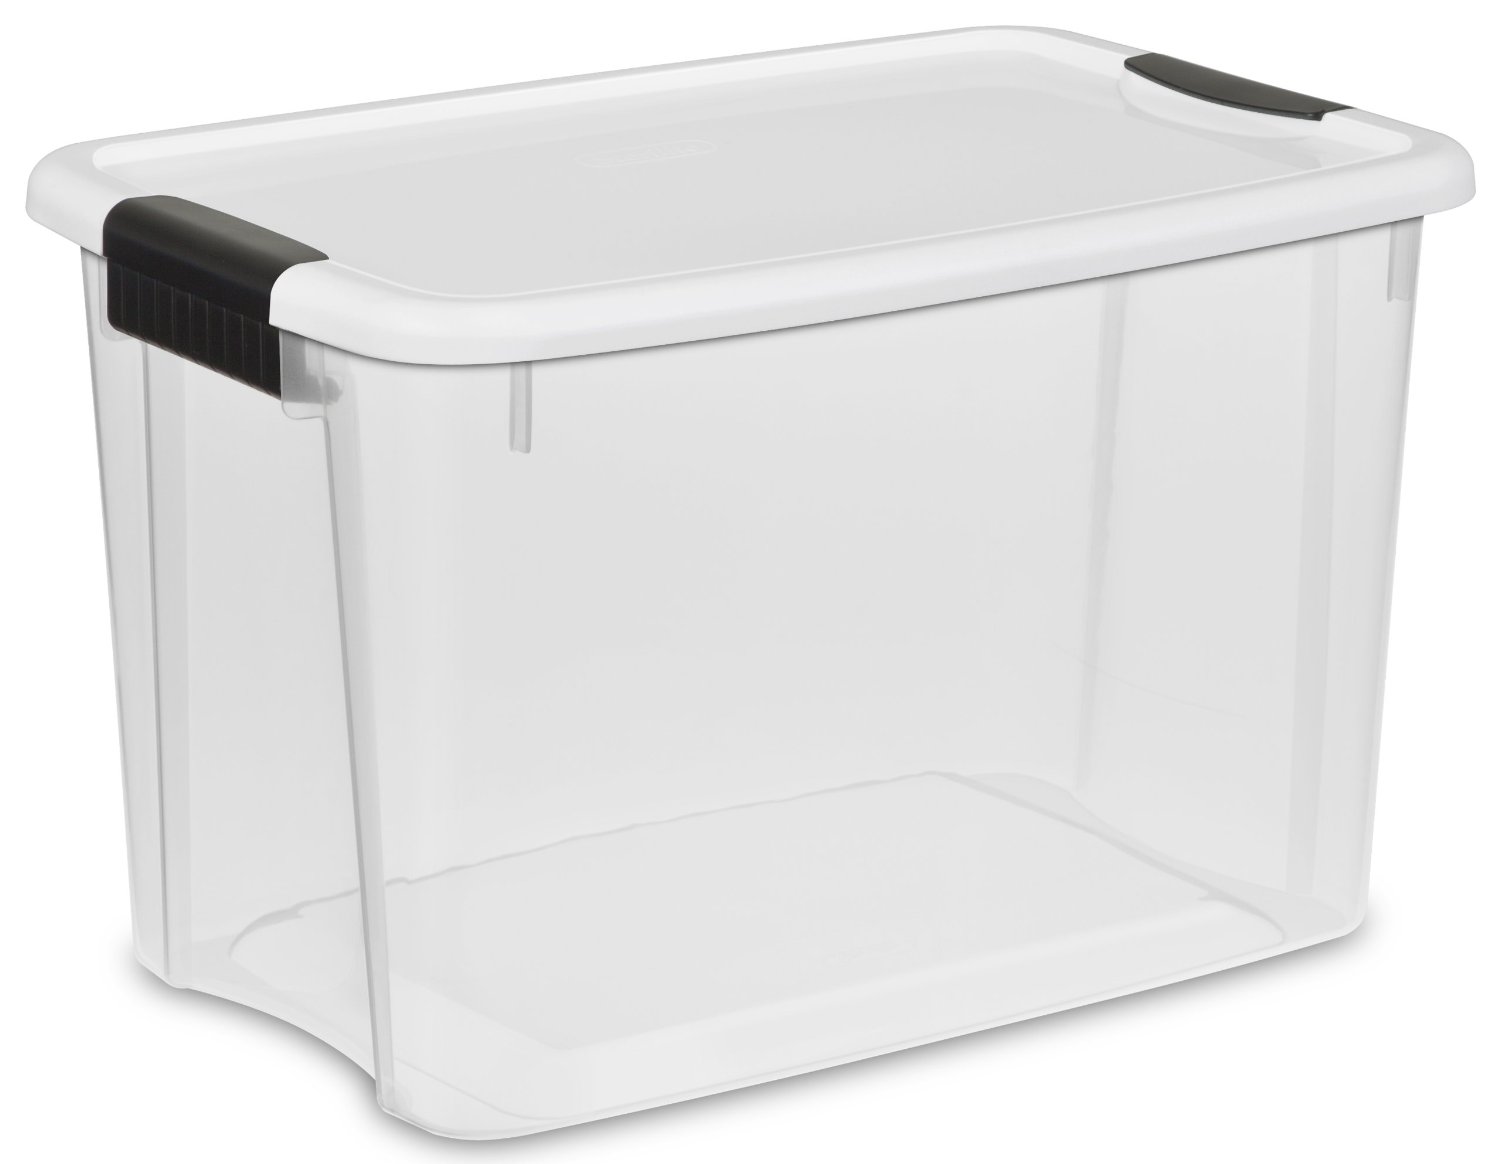
Keep original packaging around only if you plan to sell an item or if it’s within warranty. Yes, despite the advice above – get rid of it! Cardboard boxes and styrofoam pieces can usually be re-purchased from a manufacturer. Your storage space is more valuable than the cost of replacing the boxes. I debated this for years and eventually chucked everything.Use large rugged clear storage bins to easily store items and see what’s in them. I like Sterlite latching bins.
- Digitize It:
Use Evernote to compile a list of all your hardware and software. Include relevant serial numbers and activation codes, URLs, and account logins. Take pictures of the front and back of hardware (useful for patching). Attach PDF manuals. This will make updating and authorizing plugins easier, and insurance claims more organized. It’s also a great way to mentally organize and prioritize your studio. Also – use 1Password to store all your logins and integrate them automatically. - Make It Vertical:
Use vertical space to your advantage with shelving and pegboards. Use first order retrievability (no overlapping tools) to make it easier to find cables and tools. I use SwirlyHooks to keep headphones and cable loops handy.


- Master The Presets:
One of the biggest pain in the asses is preset management. Every synth uses a different directory location to store presets and often a different file format. This becomes even more difficult when working with multiple computers. For primary use, whenever possible – try to keep your user presets in a central cloud location for easy recall. Take screenshots of presets and attach both the pics and actual preset files in an Evernote doc for easy backup and recall. As I learned recently when upgrading OSX, things break and active session presets can disappear – so make sure they are backed up.
- Future Proof:
Will your session open in 20 years? Would someone else be able to understand the organization and quickly find what they need? Include markers in the session that define the tempo and key. Use a numbering system for drafts and always include the current date. Freeze and bounce any software instruments. Bounce all stems and FX returns, consolidate important MIDI parts, and include them in the session. Name, group, and color code every track. Use comment sections to leave notes to your future self. Will you be able to find your session? Make sure it comes up in Spotlight or Explorer search. - Consolidate:
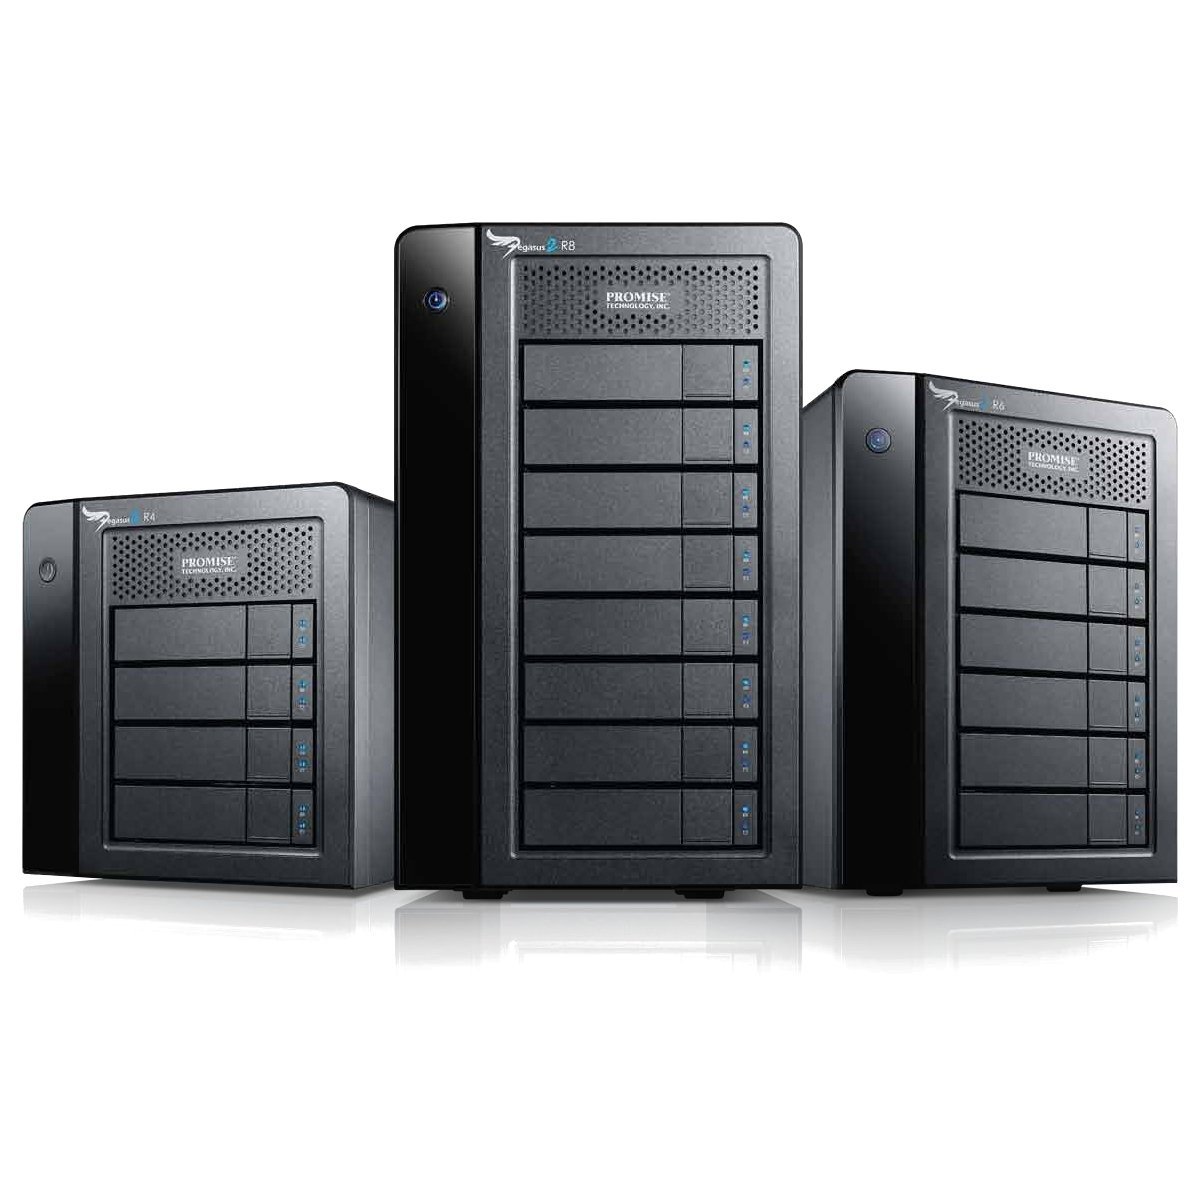
Is your data scattered around multiple drives? Consolidate all your legacy backups on to one drive and schedule a cloud backup for easier searching. I currently use Pegasus drives for my legacy backups. Save the old drives in storage for emergency recall later. Make this a habit every few years. I can’t tell you how many times a request comes in for a 10 year old song, and I no longer can locate the session. All media eventually fails – whether it’s CDs, DVDs, HDs, SSDs, or flash drives. Pare down your sample and preset libraries. If you find yourself skipping over the same presets and samples, move them to a different directory in storage. Scan and consolidate any handwritten notes into Evernote instead of hoarding them.. I do this for song to-dos, lyric sheets, brainstorms, chord progressions, and plug-in ideas.

- Label and group everything:
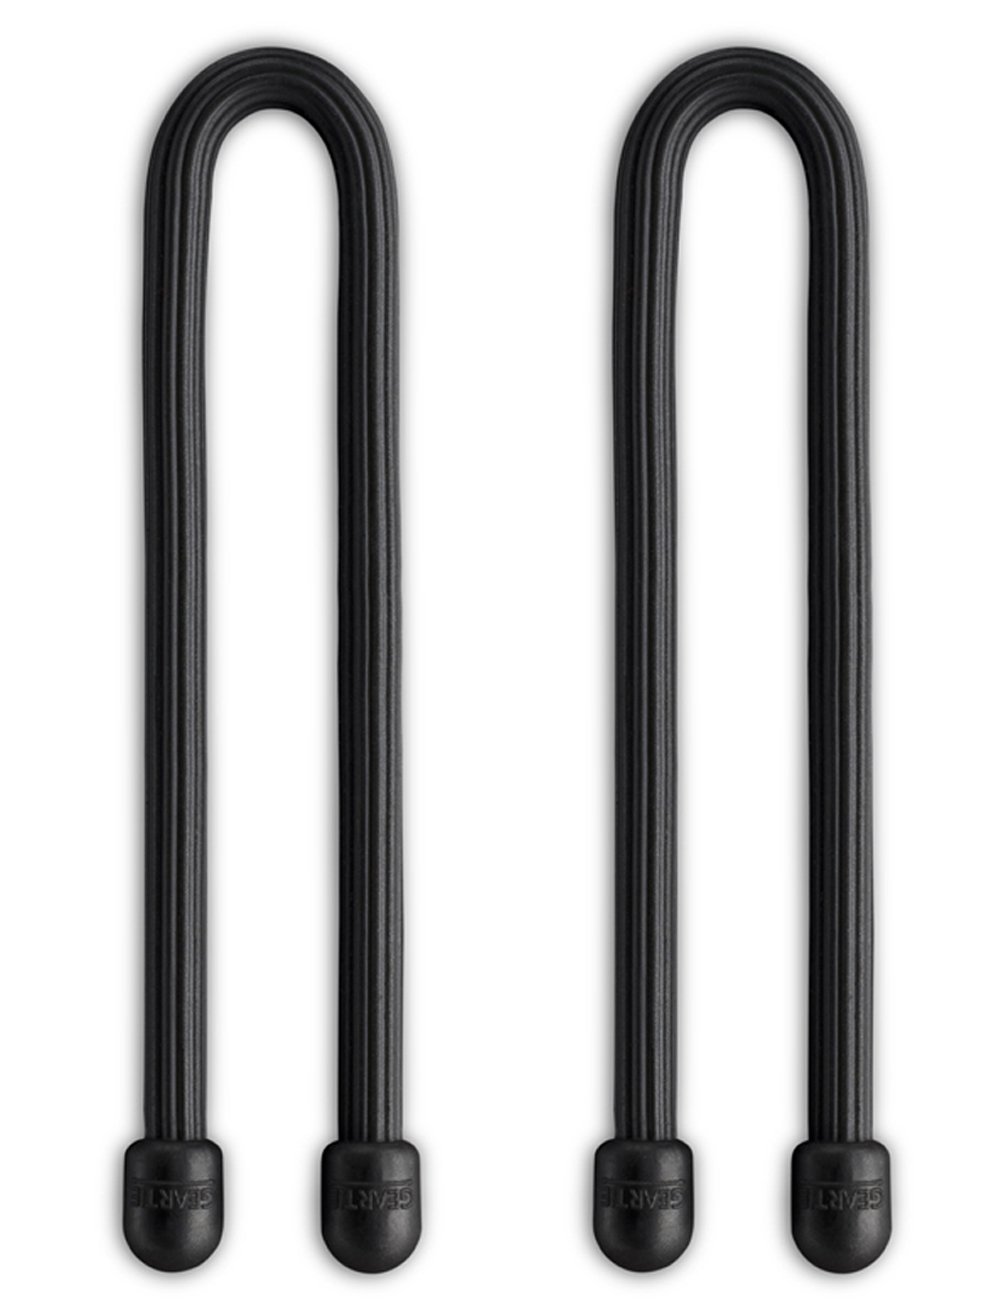
Take the time to physically label everything (power, data, audio), but leave room for flexibility – since your studio setup will change over time. I’ll often use masking tape (doesn’t leave an adhesive residue) with a metallic sharpie (easier to see in dark spaces w/ a flashlight), and then later use a labelmate to print out more permanent adhesive labels. Use gear ties to keep cables in place – I personally love Nite Ize gear ties, which allow flexibility with cables. Color code everything to make things even easier. Use different colors for each item, but try color coding in groups to keep things organized. Ex: all instruments in various shades of green, all outboard gear in variations of blue.

- Analog vs Digital Workspace:
In Austin Kleon‘s amazing book “Steal Like An Artist” he advocates for creating two workspaces. One digital, and one analog. Try compartmentalizing your workspace – keep one area for email and online activities, and another for physical media: tools, paper, and pens. Use corkboards, moleskine notebooks, and static cling dry erase boards to brainstorm new ideas in a more fluid, analog way. They don’t have to be two rooms – just two different desks. Try it out and see how it changes your work process.
- Make a Diagram:
Visualize your entire studio – all the ins and outs, the processing chains, and the gear. Then plot it using software like Mindmeister to create a dynamic, organized flow chart of your setup with images. This is very useful for setting up the routing of your studio. Take it one step even further by including front/back images of your hardware, using color-coding, and adding symbols.
Got ideas, questions, or feedback you’d like to send?
Email me: mpquicktips+blog@gmail.com
Stay Informed!
Join the mailing list to stay updated on new products:
mpquicktips+list@gmail.comWant more tips?
Explore 300+ daily tips at http://twitter.com/mpquicktips


I really, really love this – a share from me! Thanks for posting 🙂